

Send SMS Text Messages from a Power Apps

In today’s article, I will show you how we can send SMS messages from a PowerApps Application.
Yes, SMSs are still a thing, and they are not going anywhere yet! so no sarcasm please 😉
I came across a scenario for one of my projects, where an organisation wanted to notify external users of certain things.
It can be for a confirmation of appointment, notification of cancellation, progress update…etc.
After a bit of research, I found Twilio, an amazing SaaS API which allows you to send SMS, WhatsApp message, Voice and/or video calls.
The solution seemed very simple and it could be implemented in no time.
To avoid breaking my NDA and disclosing any of the client information, I will create a simple demo application, which allows me to send SMS messages and view the history of my message.
1- Environment
A simple mobile application, with mainly two features:
- Send SMS
- View messages history
2- Create a Twilio Account
- Navigate to https://www.twilio.com/ and create a new account.
- Log to you portal, from which you can buy some credits to send SMSs –> Pricing list
- Once you have acquired enough credit (20$ would allow you to send about 475 SMSs)

- You will also need to buy a number from which your messages will be sent. A normal 10 digits number will cost you about 1.15$ per month.
Once you have bought the necessary credit and number, you are all set to get started.
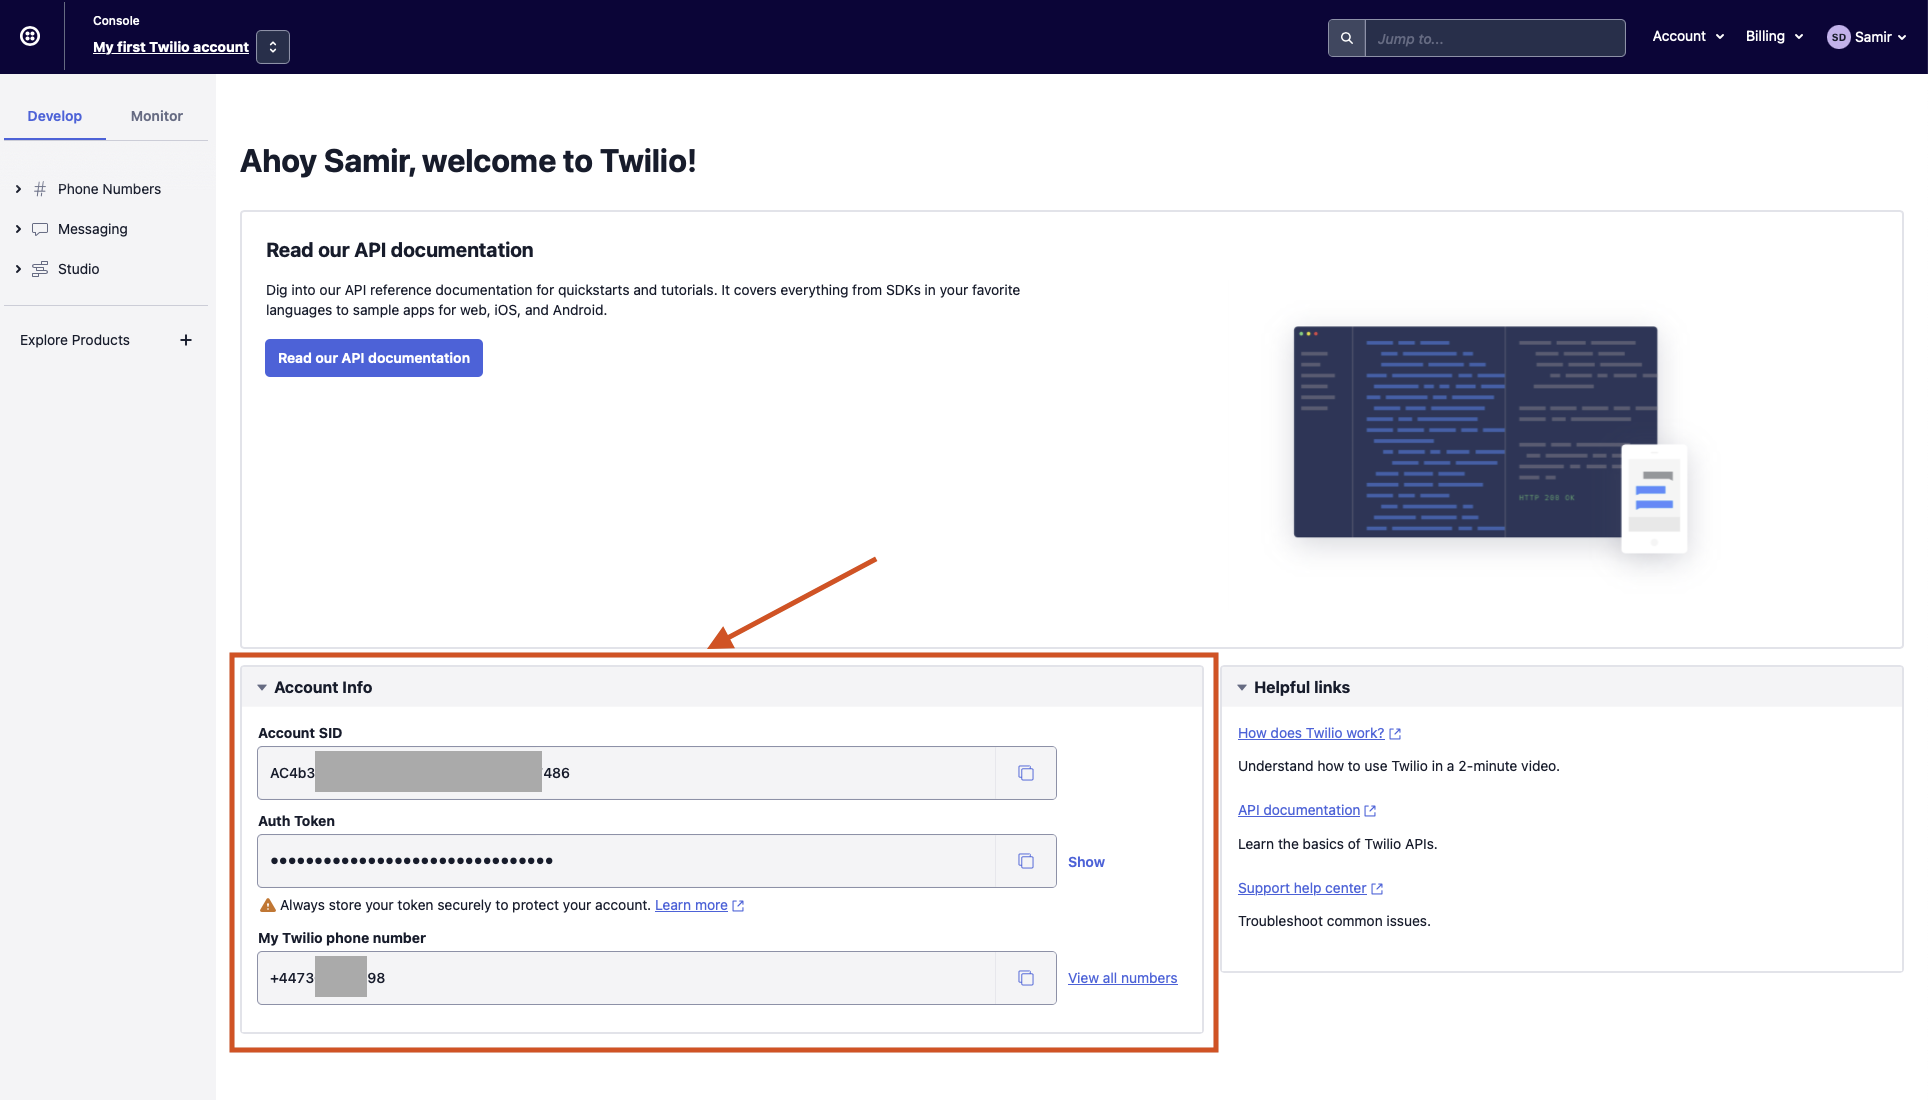
The following parameters are required:
- Account SID
- Auth Token
- Purchased Twilio phone number.

3- The App

This is the final application we will be building as part of this demo.
The app has two screens, one to send an SMS and the second to view what has been sent previously.

4- Power Automate
For this demo, I will use a power automate which takes two parameters from the app, the mobile number and message content.
The most important part of the power automate is the Twilio action, more precisely the connection which needs to be set properly.
To add the step of sending an SMS using Twilio, simple search for Twilio API action:

Once you have selected the action “Send Text Message (SMS)“, you will be prompted to create a new connection.

Provide the following parameters:
- Connection name: Can be anything.
- Twilio Account Id: Account SID
- Twilio Access Token: Auth Token
And click Create.
Now you have the action Send Text Message (SMS) configured.
Please remember to use the same From Phone Number, this is the actual phone number you have purchased in your twilio account.

Now, we are done with our power automate, let’s use it in the Power Apps.
5- The App
Once you have designed your screen, with simply two text fields, you need a Send button which trigger the Power Automate create earlier.
5.1 Connect your power automate to your power apps:
From your Power Apps, select the Power Automates icon, and Click Add Flow,
This will prompt you to select a flow from your environment, please select the one you have create in the previous step, and we are ready to go.

5.2 Call the Power Automate from the send Button
Now, that we have designed the screen and linked our Power Automate, it is time for the Show !
The Save button can be as simple as:

The Send button runs the following code:
SendSMS.Run(Value(cTxtTo.Text),cTxtMessage.Text);
Notify("Your SMS has been sent successfully !",NotificationType.Success);
6- Result
It can’t get any simpler, once you click the Send Button, the following SMS Text is received by your recipient


