

Power Apps – Azure DevOps Integration

I have previously covered the integration of PowerApps and GitHub. If you haven’t already, check out my previous post by following this link.
Let’s explore how to connect Power Apps with Azure DevOps and adequately track all your app changes.
1- Sign up to Azure DevOps
I assume that you already have an Azure DevOps account. If you don’t, you can sign up for free at https://visualstudio.microsoft.com/.
2- Create a new Project
First thing, you will need to create a new project.

From your landing page, click on the New Project button.
Now, you can provide your project details.

3- Create a PAT (Personal Access Token)
Once you create your new project, you will need to generate a Personal Access Token, which will be used to read/write data from/to your repository.
a. From your User Settings menu, select Personal Access Tokens

b. From the PATs page, Click on the New Token button

c. Set your token name and scope(s)
You can define either specific permissions or grant it full access.

d. Generate a token and make sure you save it in a secure location.
Once you set your permissions, click Generate token.

4- Enable the Git Hub Experimental
We must activate the experimental feature “Show the Git version control setting“.
- From your App, navigate to the settings page and select the upcoming features.
- Please search for the Show the Git version control setting feature and enable it.

5- Connect Power Apps to your Git Hub Repository
Once you enable the “Show the Git version control setting” feature, a new section will appear in your App Settings

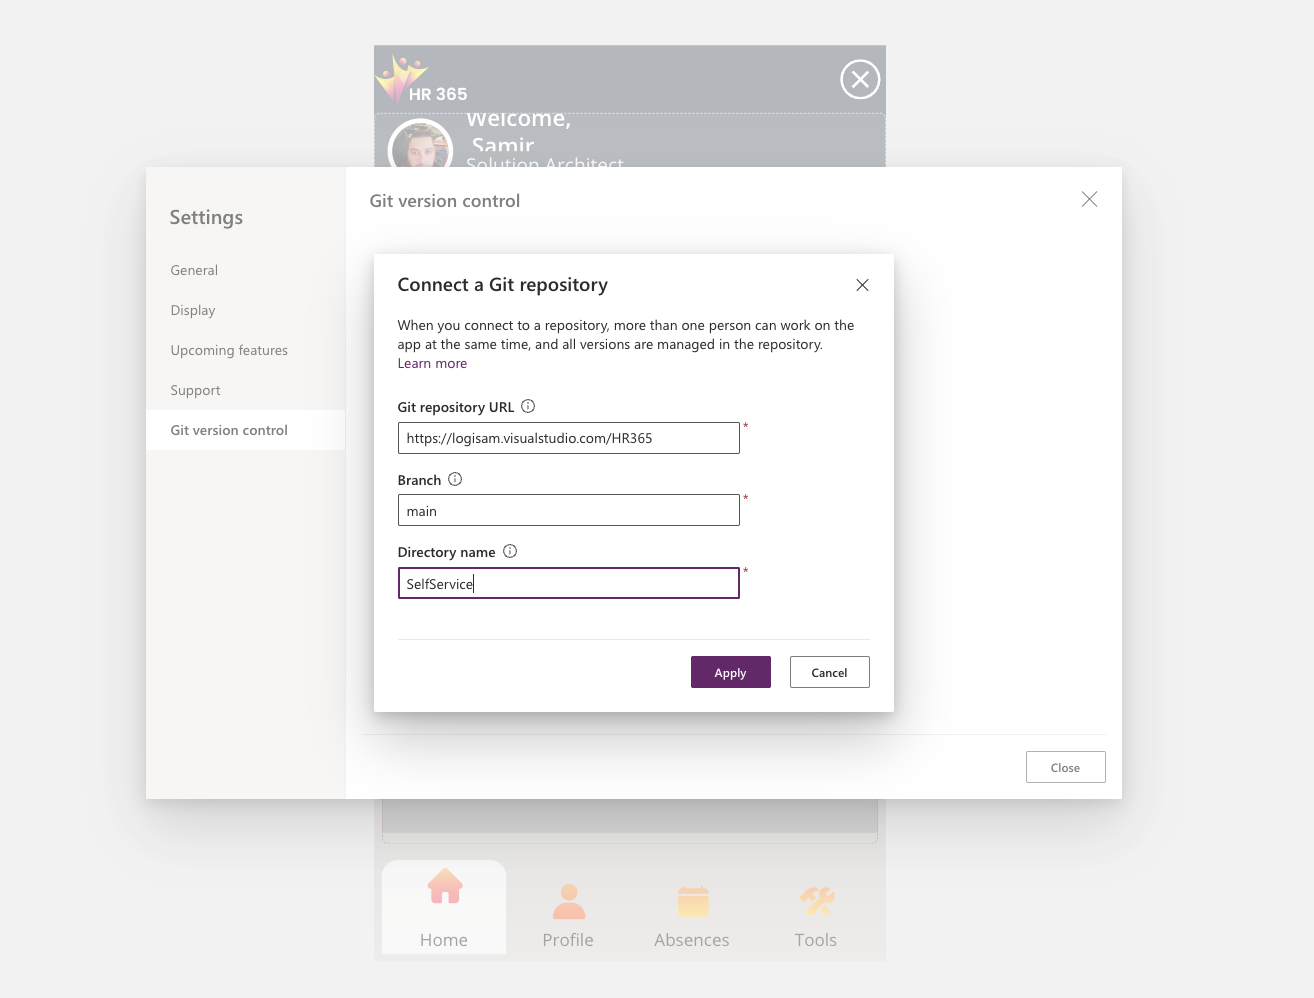
Click Connect, and let’s go through the wizard:
- Git repository URL : This is the root URL of your Azure DevOps repository.
- Branch: this is the branch name you will use for your project.
- Directory name: the folder name for synchronisation of your app code. Strangely, this can’t be a blank or / for the root level; your app must be synchronised to a folder.

The next screen allows you to input your username (Azure DevOps username), and token from step3.

Once you enter the login and token details, you will see the following screen:
 6- Commit your changes to Azure DevOps Repo

Once you finish the setup steps, you will notice this new icon on the top right side of your screen

Anytime you change your app, you can commit these changes to git hub.
7- Your app content in Azure DevOps Repo
Now, you can navigate to Azure DevOps Repo and check your app content.
As we have specified a folder named “Self Service”, you will find all your files in this folder:

Enjoy 😍 !


